Sainsbury's SmartShop API
Hi. Been doing things so I may as well write.
Over the past few months I’ve been on and off looking into Sainsbury’s SmartShop. This post is a look at how I got started.
I do skip details though, so if you’re looking to implement just keep that in mind.
What is SmartShop?
SmartShop is an app by the UK retailer Sainsbury’s, meant to make shopping quick and easy. You scan items while shopping, pay at a checkout and leave.
I’m here to talk about the tech, though! So I’ll move on.
Intercepting traffic
In order to study the app’s traffic - which is encrypted with TLS - we need to act as a Man in The Middle (MITM) and intercept it.
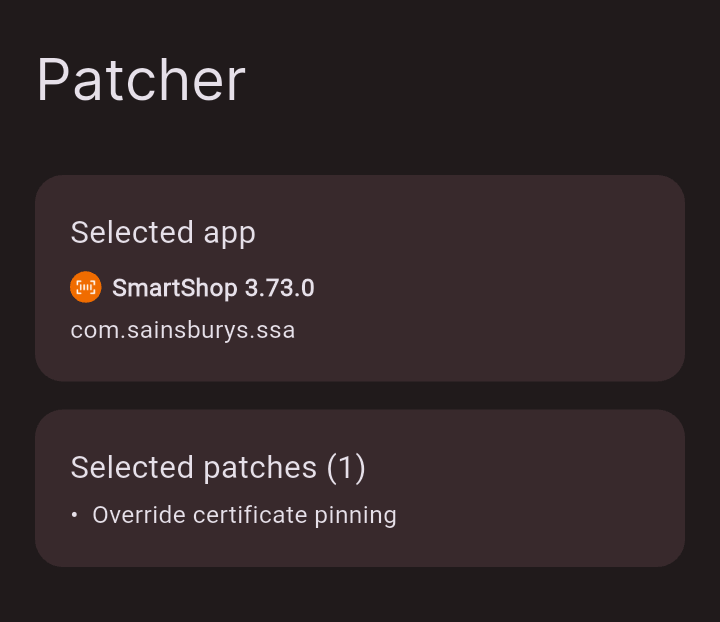
This is done by presenting our own TLS certificate to the app so we can see what it’s sending to Sainsbury’s. But many apps won’t trust weird certificates! Either due to certificate pinning (only trusting specific certificates) or only trusting certs the OS came with, which I believe is our case.
So first, we need to patch it to trust our certificate. apk-mitm and android-unpinner are good for this job, but I decided to try ReVanced Manager out to patch it.
Okay, now we need a proxy to actually do the interception. mitmproxy, Burp Suite and such are good contenders.
But since I’m doing this in-store, without a laptop, PCAPdroid and its MITM plugin worked great. Even with a computer attached, it’s a highly useful tool anyway!
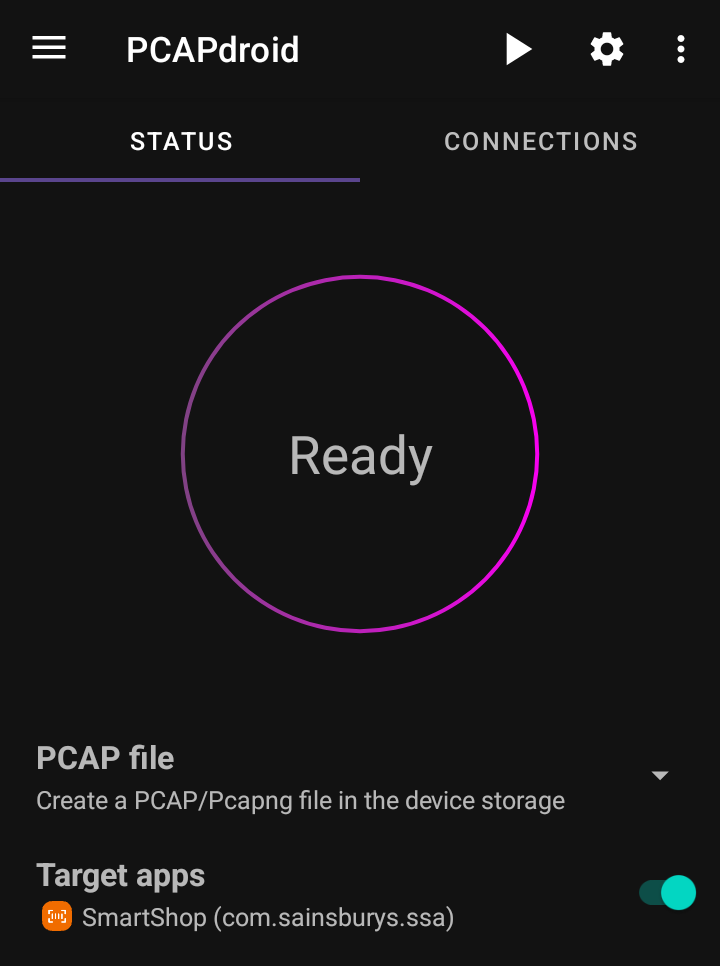
And with that, I went shopping.
Viewing traffic
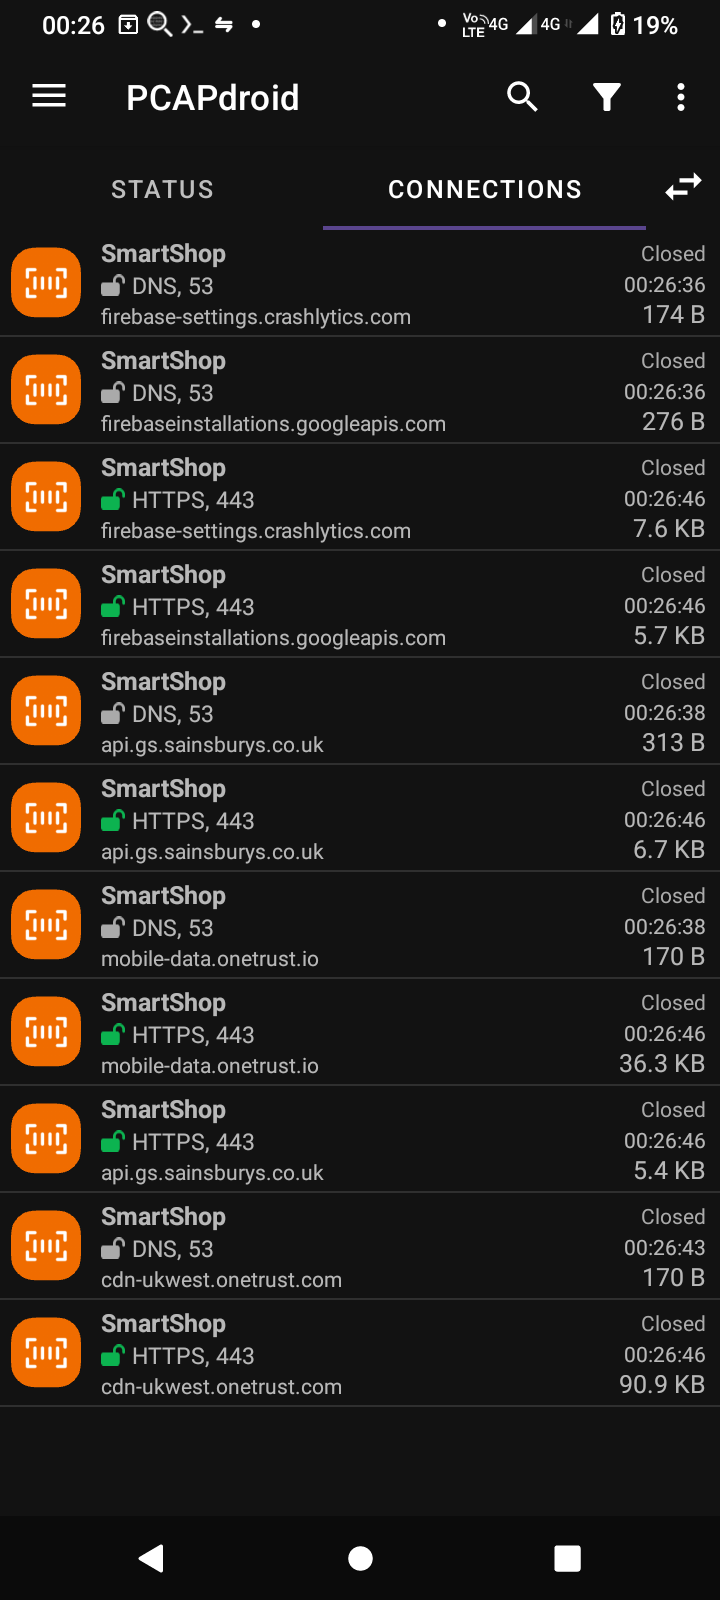
I bought a number 9 large.
Anyway, it was immediately clear that api.gs.sainsburys.co.uk is where business happens. But this post won’t cover all the endpoints I saw used, just the basics like authentication and shopping.
Logging in
This request:
POST /identity/api/v1/tokens
Authorization: Basic c3NfYW5...

grant_type=password&username=plate@example.com&password=hunter2
Gets this response:
{
    "access_token": "eyJh...",
    "refresh_token": "eyJh...."
}
And you’re logged in! When you need to refresh your access_token, use the same endpoint with this body:
grant_type=refresh_token&refresh_token=eyJh...
The response will be the same, with new tokens.
You may wonder why the app provides an Authorization header before you’re even authorised. I’ll cover that later.
Shopping
Now you have your bearer token, make a shopping basket1:
POST /shop/api/v1/shops?store_id=1234
Authorization: Bearer eyJh...
X-Store-Id: 1234
{"store_id": "1234"}
Which looks like this:
{
  "allowed_to_move_to_any_till_after_rescan": false,
  "basket_entries": [],
  "created_time": "1970-01-01T00:00:00+0000",
  "shop_id": 123123123,
  "modified_time": "1970-01-01T00:00:00+0000",
  "rescan_checked": false,
  "restrictions_enabled": false,
  "restriction_checked": false,
  "shop_total": 0.00,
  "status": "active",
  "store_id": "1234",
  "_embedded": {
    "basket": {
      "sub_total": 0.00,
      "discount_total": 0.00,
      "till_restricted": false,
      "total": 0.00,
      "item_count": 0
    }
  }
}
Making and modifying baskets returns the updated version in the response, so I won’t include it every time.
Then add in your items:
PUT /shop/api/v1/shops/123123123/basket/items
{
  "item_id": "00490160",
  "quantity": 1,
  "store_id": "1234"
}
Now there’s an item in there!
{
  "modified_time": "1970-01-01T00:01:00+0000",
  [...]
  "shop_total": 0.79,
  [...]
  "_embedded": {
    "basket": {
      "sub_total": 0.79,
      "discount_total": 0.00,
      "nectar_discount_total": 0.00,
      "till_restricted": false,
      "total": 0.79,
      "item_count": 1,
      "_embedded": {
        "basket_item": [
          {
            "quantity": "1",
            "restricted": false,
            "seq_id": "1",
            "line_price": 0.79,
            "item_total_discount": 0.00,
            "tagged": false,
            "scan_to_delete": false,
            "ean": "0000000490160",
            "is_vat": false,
            "price_modifier": {},
            "_embedded": {
              "product": {
                "dept_name": "Bread",
                "group_name": "Brd Cake \u0026 Mng Gds",
                "images": [
                  {
                    "uri": "https://assets.sainsburys-groceries.co.uk/gol/8144404/image.jpg",
                    "rank": "1",
                    "alt_text": "Sainsbury\u0027s Lightly Seeded 800g"
                  }
                ],
                "is_tagged": false,
                "item_id": "0000000490160",
                "item_price": 0.79,
                "long_description": "Sainsbury\u0027s Lightly Seeded 800g",
                "short_description": "Sainsbury\u0027s Lightly Seeded 800g",
                "sku": "8144404",
                "unit_of_measure": "EA",
                "age_restriction": 0,
                "is_catch_weight": false,
                "eans": [
                  "0000000490160"
                ]
              }
            }
          }
        ]
      }
    }
  }
}
When you’re done, mark the basket as finished and set with a PATCH request to its URL:
{
  "pos_id": "42",
  "status": "user_finished",
  "store_id": "1234"
}
And move it to a till with the posmovements API.
POST /shop/api/v1/shops/123123123/posmovements
{ "pos_id": "42" }
That’s it! You just shopped! At this point, can you make a script or custom app for SmartShop?
Yes, but there’s one small problem that stops you from ditching the official app.
One big problem
Earlier, I showed that when getting and refreshing tokens, with /identity/api/v1/tokens, you need to provide a HTTP username and password.
POST /identity/api/v1/tokens
Authorization: Basic c3NfYW5... <-- this pesky thing

grant_type=password&username=plate@example.com&password=hunter2
Not an issue, right? Just copy the header.
curl -H "User-Agent: Smartshop/3.73.0 (Google Pixel Pro Max; Android 420; Build/1337)" \
    -H "Authorization: Basic c3NfYW5..." \
    https://api.gs.sainsburys.co.uk/identity/api/v1/tokens \
    -d grant_type=client_credentials

{
    "type": "about:blank",
    "title": "Unauthorized",
    "status": 401,
    "detail": "Authorization missing or invalid"
 }
This fails, because the header is single use. You need to know the structure to make a new one! Let’s look.
$ base64 -d <<< c3NfYW...
ss_android_mobile_1k:OAtDjYf...
For a username, we have ss_android_mobile_1k. In the app’s code this is called the “client ID”, I don’t know all the possible ones but it can differ. The password is a very long Base64 string, which we decode again:
$ base64 -d <<< OAtDjYf...
[ binary gibberish ]
This is bad. The password is a blob of binary, but has to be generated because we can’t reuse it. It’s almost like they encrypt the password..! (they do)
Without a way to generate new ones, you’re forced to use the app at least once to get authentication working.
Digging into the app
The answers for how this header is made must be in the app’s code. Sadly, I’m not a Sainsbury’s engineer2 so we must decompile it.
Jadx is a Dex (Android’s VM format) to Java decompiler. By giving this an APK of the app, we can look for the function that makes the gibberish password.
(note: the code I show is from the handset version, not the Play Store one. So your decompile could differ, but both apps work the same)
I am not going to retrace my steps through the code, but I found the solution in the DynamicKeyCreator class of the com.sainsburys.ssa_handset.data.network package. Its generate() method gives us the auth header:
public final String generate() {
    String str = "" + this.clientId + MqttTopic.MULTI_LEVEL_WILDCARD + this.dateProvider.getDate() + MqttTopic.MULTI_LEVEL_WILDCARD + this.uuidProvider.generate();
    try {
        this.cipher.init(1, this.rsaPublicKey);
        Cipher cipher = this.cipher;
        Charset charsetForName = Charset.forName("UTF-8");

        byte[] bytes = str.getBytes(charsetForName);

        byte[] bArrDoFinal = cipher.doFinal(bytes);

        byte[] bArrEncode = Base64.getEncoder().encode(bArrDoFinal);

        String str2 = this.clientId + ServerSentEventKt.COLON + new String(bArrEncode, Charsets.UTF_8);
        Base64.Encoder encoder = Base64.getEncoder();
        Charset charsetForName2 = Charset.forName("UTF-8");

        byte[] bytes2 = str2.getBytes(charsetForName2);

        byte[] bArrEncode2 = encoder.encode(bytes2);

        return new String(bArrEncode2, Charsets.UTF_8);
    } catch (Exception unused) {
        return "";
    }
}
Woah! That needs to be broken down. Let’s look at the first line:
String str = "" + this.clientId + MqttTopic.MULTI_LEVEL_WILDCARD + this.dateProvider.getDate() + MqttTopic.MULTI_LEVEL_WILDCARD + this.uuidProvider.generate();
This variable, str, is the password before encryption. It’s made of these five things:
this.clientId- you saw this, it’s the same as the username:ss_android_mobile_1kMqttTopic.MULTI_LEVEL_WILDCARD- this is the “#” symbolthis.dateProvider.getDate()- the current date and time. TheDateProviderobject in the app is set up with the format"yyyy-MM-dd HH:mm:ss"- Another “#”
this.uuidProvider.generate()- a request UUID of some kind, in UUIDv4 format
After putting that together, the code sets up a Cipher object with a public key. They made things quite modular, so the public key and encryption type ("RSA/ECB/PKCS1Padding") are in a different file.
    try {
        this.cipher.init(1, this.rsaPublicKey);
        Cipher cipher = this.cipher;
The password is UTF-8 encoded and stored as bytes.
        Charset charsetForName = Charset.forName("UTF-8");
        byte[] bytes = str.getBytes(charsetForName);
Then it’s encrypted, and the encrypted bytes are Base64 encoded!
        // get encrypted bytes
        byte[] bArrDoFinal = cipher.doFinal(bytes);
        // encode the bytes with base64
        byte[] bArrEncode = Base64.getEncoder().encode(bArrDoFinal);
The rest of the function puts together the username and password into a new string then Base64 encodes that.
        // "[client id]:[base64 encoded password]", as UTF-8
        String str2 = this.clientId + ServerSentEventKt.COLON + new String(bArrEncode, Charsets.UTF_8);
        // now we encode the UTF-8 bytes of the string above!
        Base64.Encoder encoder = Base64.getEncoder();
        Charset charsetForName2 = Charset.forName("UTF-8");
        byte[] bytes2 = str2.getBytes(charsetForName2);

        byte[] bArrEncode2 = encoder.encode(bytes2);
        // return the complete string
        return new String(bArrEncode2, Charsets.UTF_8);
As for the key, it’s in com.sainsburys.ssa_handset’s BuildConfig class:
public static final String PUBLIC_KEY = "MIGfMA0GCS..."
Porting basic auth
So now we know how the header is made, but I don’t work in Java.
I tried to rewrite the code in Python first, but I didn’t even know what kind of crypto matches up with what’s used in Java. That caused a lot of frustration.
So I ended up doing it in Java first, so I could make headers and test with curl. This really helped! You can find it at plate/smartshop-auth-helper on Codeberg.
The Python version is quite short. You’ll need pycryptodome to use the crypto parts:
import base64
import time
import uuid
from Crypto.PublicKey import RSA
from Crypto.Cipher import PKCS1_v1_5

rsa_key = RSA.import_key("[RSA key in PEM format]")
# username: client_id
client_id = "ss_android_mobile_1k"
# password: "client_id#date#uuid", encrypted with rsa_key then base64 encoded
date = time.strftime("%Y-%m-%d %H:%m:%S")
to_encrypt = bytes(client_id + "#" + date + "#" + str(uuid.uuid4()), "utf-8")
cipher = PKCS1_v1_5.new(rsa_key)
encrypted = base64.b64encode(cipher.encrypt(to_encrypt))
print("password:", encrypted.decode("utf-8"))
There you go! It works now!
If you’d like to look at a half-working implementation, please see libssa. It doesn’t match the app 1:1, nor does it have every endpoint. But you should be able to learn from it!
Thank you for reading! I’m planning on covering more, specifically focused on the handsets used in-store. Compared to the app customers can use, there is more going on with them, so they’ve been a small obsession of mine.